- Docs
- Your first app
- 5. Add a floor plan
Step 5: Add a live floor plan
Ask for a change in plain words: a live floor plan with the robots, the rack tugger and the drone moving.
Now change the board by asking, the way you'd ask a colleague. Rivet works out what to change.
Ask for the floor plan
Click in the box under the chat (it says Ask for a change), paste this and press Return:
Add a live floor plan of the ground floor, right under the headline numbers, showing where each robot, the rack tugger and the drone are as they move. Make the four headline numbers one short row across the top.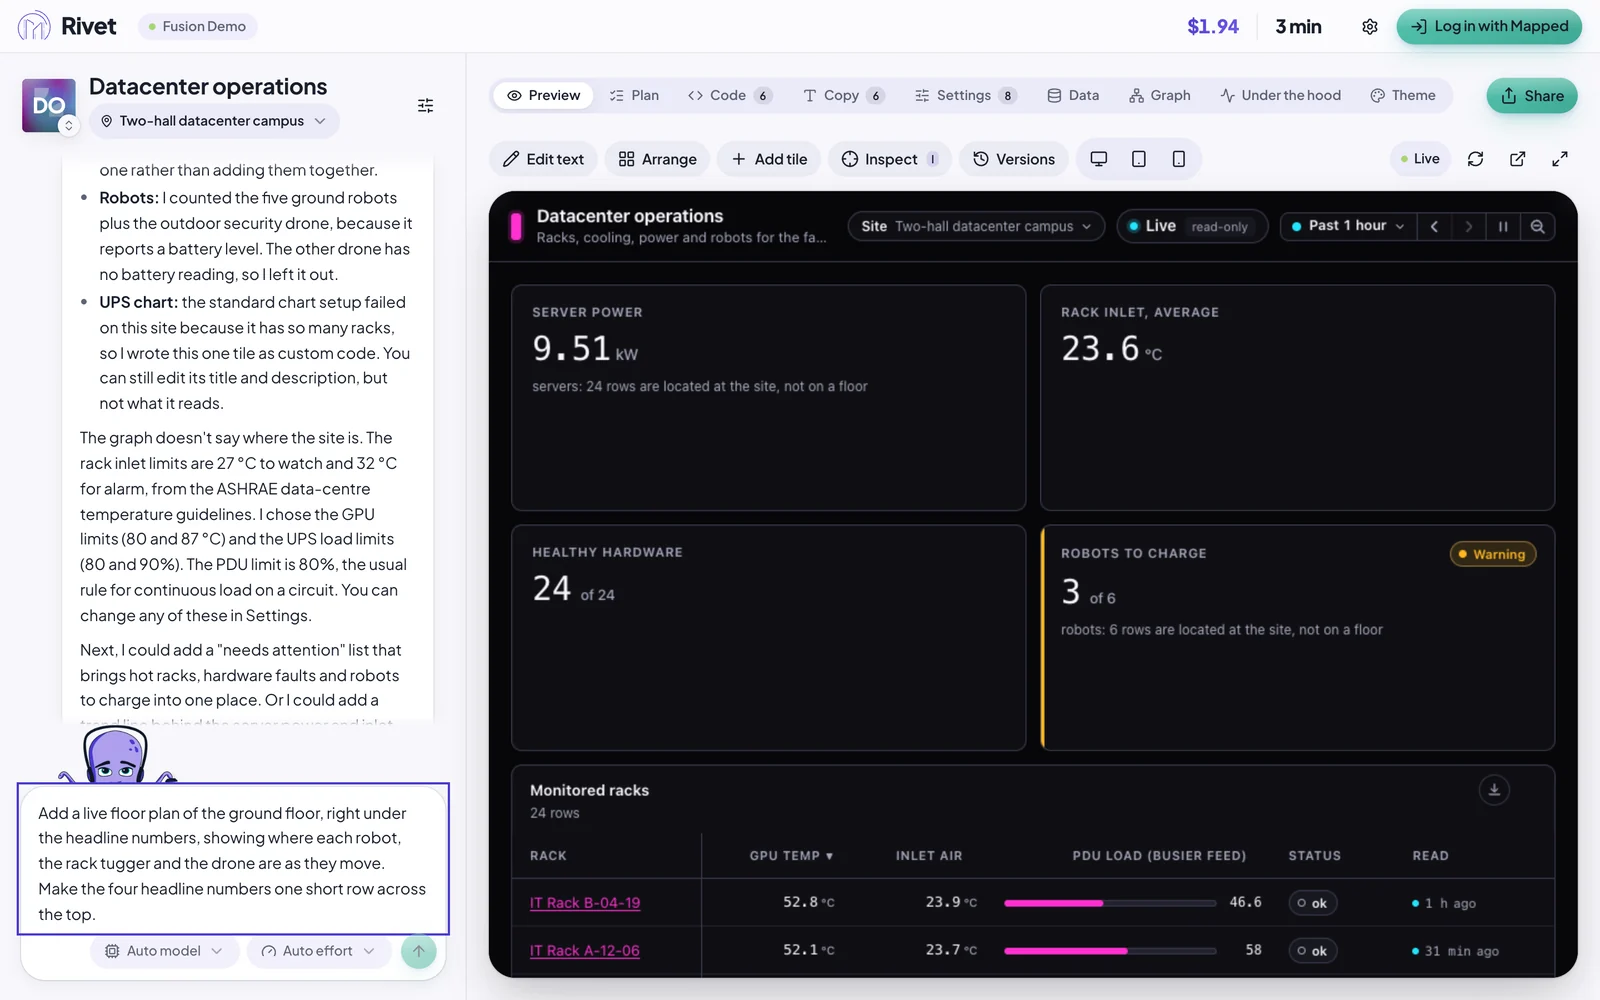
Rivet decides how big the change is. A small change, like a word or a colour, is done in seconds by a quick helper. This one needs a new tile, so Rivet plans it itself. In our run on 2026-10-16 it took 38 seconds.
Your floor plan
The plan draws the ground floor from the building's own drawings in Mapped: both data halls with their rows of racks, the north and south galleries, and the rooms beside the halls, the security office among them. The robots, the rack tugger and the drone move across it as they report their positions; in our run the site's guards and technicians did too. With live data off they still move, updated every few seconds.
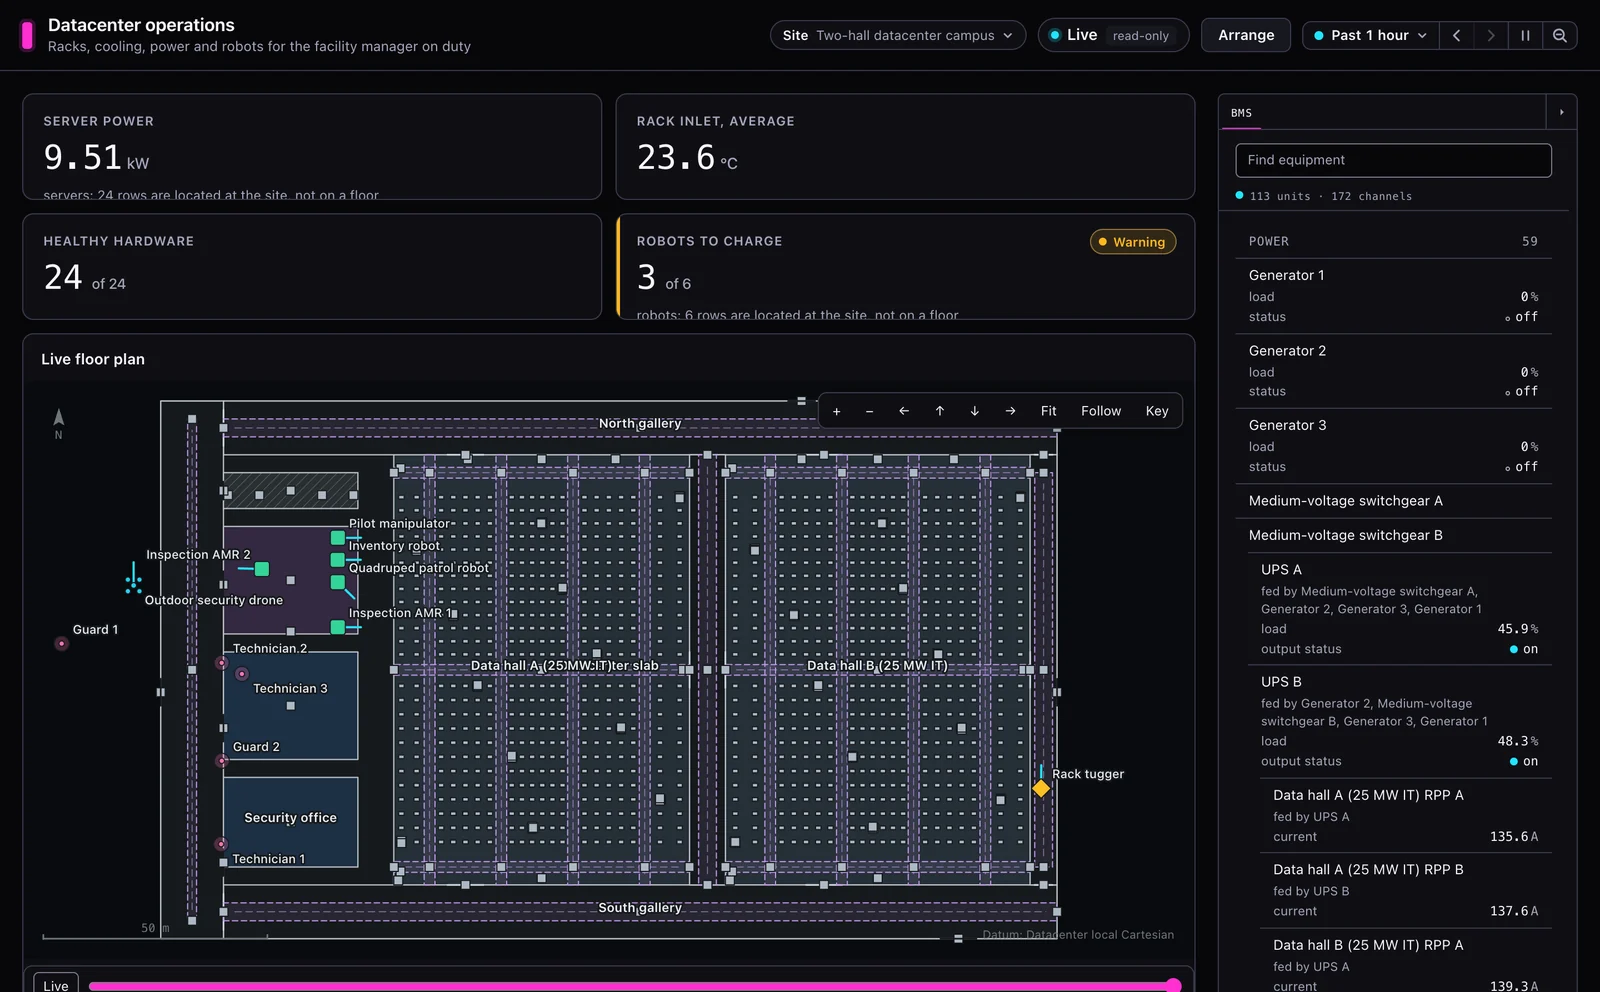
On the plan:
- Scroll or pinch to zoom, and drag to move around. The + and − buttons and the arrows do the same.
- Fit shows the whole floor again.
- Follow keeps a moving robot in view.
- Key explains the colours and symbols.
- Live, along the tile's foot, is its own time control: drag it back to see where everything was. See Take one plan tile back in time.
Next: make it yours.